Use Next.js 12.2 On-Demand ISR and Supabase Function Hooks to automatically refresh stale data
30th June 2022
To celebrate the stable release of On-Demand Incremental Static Regeneration (ISR) in Next.js 12.2, I wanted to put together an example that shows how this can be used with Supabase Function Hooks to ensure that your static data is never stale!
Function Hooks allow us to subscribe to particular events in the database — such as insert , update or delete — and automatically send a POST request to an endpoint — in our case, an API route responsible for rebuilding our stale Next.js pages.
🚀 The final version of the code can be found in this repo.
Let’s start by creating a new Next.js project:
npx create-next-app revalidate-on-demand
Make sure the
nextversion is at least12.2.0in thepackage.jsonfile.
Now head over to Supabase and create a new project.
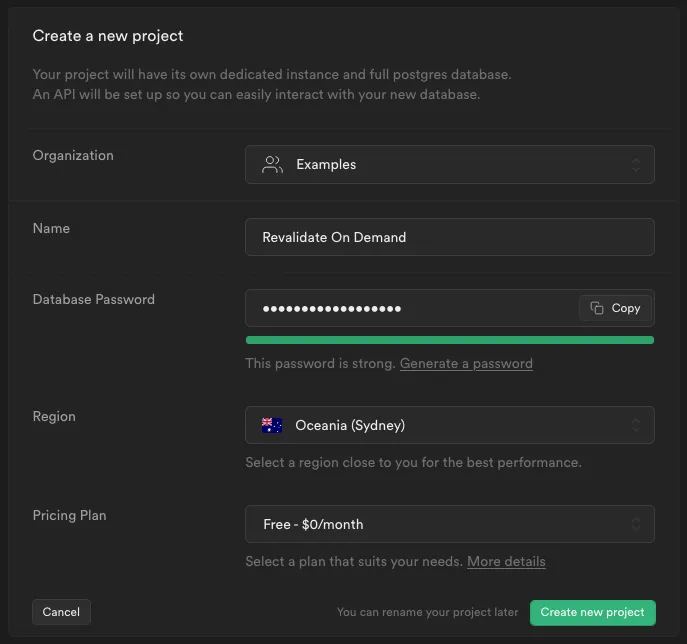
Choose a
Regionthat is geographically close to you.
It will take a few minutes to provision all the bits for your project. Once it is finished, we need to create some tables. You can use the Table Editor for this, or just copy and paste the following SQL snippet into the SQL Editor .
create table if not exists posts (
  id uuid default uuid_generate_v4() primary key,
  created_at timestamp with time zone default timezone('utc'::text, now()) not null,
  title text not null,
  content text not null
);
This is a Supa simple table to store blog posts in. Let’s write some articles.
insert into posts(title, content)
values
	('My first blog', 'This is my very first blog'),
	('My second blog', 'Wow, I still feel so inspired to write');
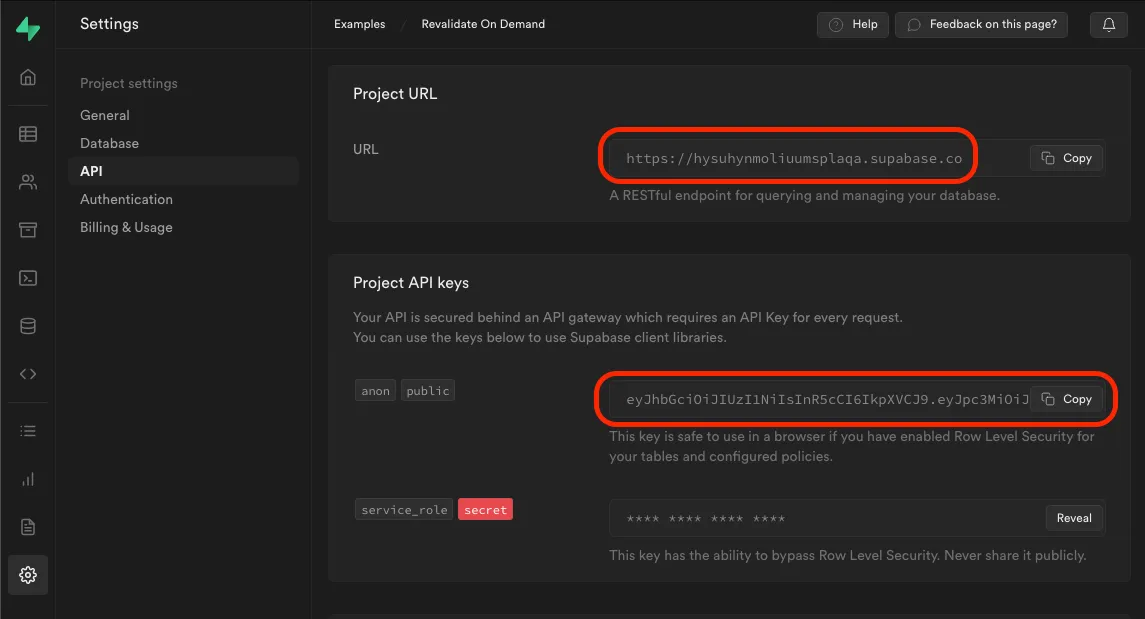
We want to display a list of these articles in our Next.js app. But first, we need to create a Supabase client. For this we will need some environment variables.
Create a .env.local file and populate with the following:
NEXT_PUBLIC_SUPABASE_URL=<your-project-url>
NEXT_PUBLIC_SUPABASE_ANON_KEY=<your-anon-key>
You can get these values from
Settings > APIin the Supabase dashboard.
Let’s install the supabase.js library:
npm i @supabase/supabase-js
And create a utility for instantiating a Supabase client. Create a new file called utils/supabase.js and populate with the following:
import { createClient } from "@supabase/supabase-js";

export default createClient(
  process.env.NEXT_PUBLIC_SUPABASE_URL,
  process.env.NEXT_PUBLIC_SUPABASE_ANON_KEY
);
Now we can replace the content in pages/index.js with this ISR template:
const BlogList = ({ posts }) => {
  return <pre>{JSON.stringify(posts, null, 2)}</pre>;
};

export const getStaticProps = async () => {
  return {
    props: {
      posts: [],
    },
    revalidate: 60,
  };
};

export default BlogList;
We are not going to cover styling in this article,
JSON.stringify(posts, null, 2)allows us to “pretty print” our JSON structure.
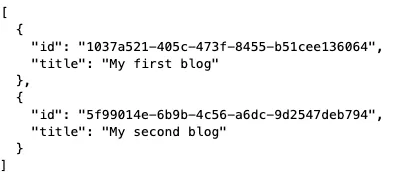
By running our Next.js dev server with npm run dev , and navigating to http://localhost:3000, we should see our empty array.
[]
Let’s wire it up to get our posts from Supabase:
const { data: posts } = await supabase.from("posts").select("id, title");
Full component 👇
import supabase from "../utils/supabase";

const BlogList = ({ posts }) => {
  return <pre>{JSON.stringify(posts, null, 2)}</pre>;
};

export const getStaticProps = async () => {
  const { data: posts } = await supabase.from("posts").select("id, title");

  return {
    props: {
      posts,
    },
    revalidate: 60,
  };
};

export default BlogList;
We are only selecting
idandtitlefrom Supabase, as we will be displaying thecontentfor each article on a separate page.
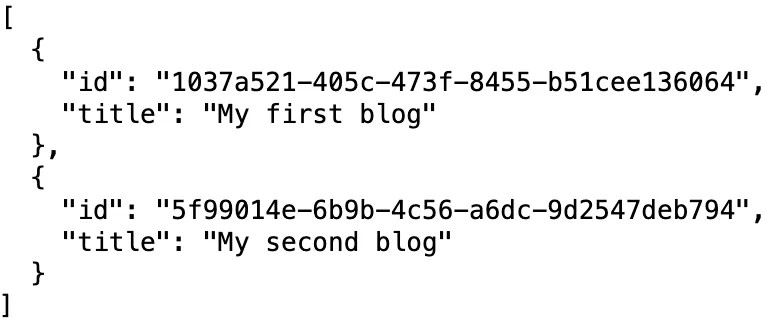
And now we should see our posts in the browser.
Let’s create a dynamic route at pages/[id].js to display the content of each of our blog articles.
import supabase from "../utils/supabase";

const BlogDetails = ({ post }) => {
  return <pre>{JSON.stringify(post, null, 2)}</pre>;
};

export const getStaticPaths = async () => {
  const { data: posts } = await supabase.from("posts").select("id");

  const paths = posts.map(({ id }) => ({
    params: {
      id,
    },
  }));

  return {
    paths,
    fallback: false,
  };
};

export const getStaticProps = async ({ params: { id } }) => {
  const { data: post } = await supabase
    .from("posts")
    .select("*")
    .match({ id })
    .single();

  return {
    props: {
      post,
    },
    revalidate: 60,
  };
};

export default BlogDetails;
revalidate is a special prop that tells Next.js how long this content should be considered “fresh”. The next person who visits the page after 60 seconds will still get the “stale” content, but it will trigger a rebuild of this page in the background.
This is a great compromise between the performance benefits of having entirely static content, and the dynamic benefits of having data fetched on every server render — using getServerSideProps for example.
But now, thanks to on-demand ISR, we can do even better — especially when we combine this with Supabase! 🚀
Let’s create an API route to handle revalidating our page at pages/api/revalidate.js and populate with the following:
const handler = async (req, res) => {
  await res.revalidate("/");
  return res.send({ revalidated: true });
};

export default handler;
Navigating to this page will now trigger a rebuild of our landing page! 🪄
As for the details page, we need to determine which id we want to revalidate. The JSON object that Supabase sends from our Function Hook — we will set this up next — is a slightly different structure for insert , update and delete . If we are inserting or updating, we want the value from the record , if we are deleting we want the old_record .
const handler = async (req, res) => {
  await res.revalidate("/");

  const pathToRevalidate = `/${
    req.body?.record?.id || req.body?.old_record?.id
  }`;
  await res.revalidate(pathToRevalidate);

  return res.send({ revalidated: true });
};

export default handler;
Supabase is now going to be responsible for deciding when the content of our app is “stale”, therefore, we no longer need our pages revalidating after 60 seconds. We could remove the revalidate prop entirely, but I am going to opt for setting this to 86400 (1 day) as a backup.
// pages/index.js

import supabase from "../utils/supabase";

const BlogList = ({ posts }) => {
  return <pre>{JSON.stringify(posts, null, 2)}</pre>;
};

export const getStaticProps = async () => {
  const { data: posts } = await supabase.from("posts").select("id, title");

  return {
    props: {
      posts,
    },
    revalidate: 86400,
  };
};

export default BlogList;
We need to do a little bit more in pages/[id].js to handle new articles, and ones that have been deleted.
Firstly, if we have a new article then this will be a path that was not returned from our getStaticPaths function. Currently, we have the fallback set to false , therefore, users will see a 404 page if this article did not exist when we deployed our application. By setting this to "blocking" , Next.js will attempt to server render paths that were not specified in getStaticPaths , and then cache the result of that static page for anyone who visits in the future.
This means we need to handle the case of articles that do not exist — either a typo in the URL or an article that has been deleted — in the getStaticProps function. We can do this by simply checking whether we got a post from Supabase, and if not, responding with notFound: true .
// pages/[id].js

import supabase from "../utils/supabase";

const BlogDetails = ({ post }) => {
  return <pre>{JSON.stringify(post, null, 2)}</pre>;
};

export const getStaticPaths = async () => {
  const { data: posts } = await supabase.from("posts").select("id");

  const paths = posts.map(({ id }) => ({
    params: {
      id,
    },
  }));

  return {
    paths,
    fallback: "blocking",
  };
};

export const getStaticProps = async ({ params: { id } }) => {
  const { data: post } = await supabase
    .from("posts")
    .select("*")
    .match({ id })
    .single();

  if (!post) {
    return {
      notFound: true,
    };
  }

  return {
    props: {
      post,
    },
    revalidate: 86400,
  };
};

export default BlogDetails;
In order for Supabase to call our /api/revalidate endpoint when data changes, our app needs to be hosted somewhere on the Internet.
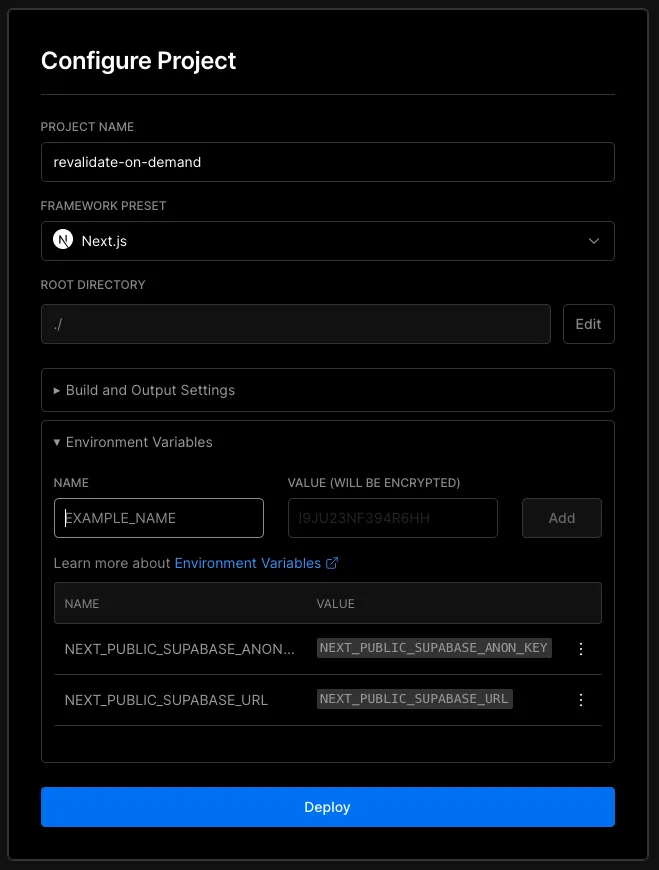
Head over to Vercel and create a new project.
Don’t forget to create environment variables for
NEXT_PUBLIC_SUPABASE_URLandNEXT_PUBLIC_SUPABASE_ANON_KEY.
Once the deploy is finished, go to your project’s dashboard and copy the URL. Mine is https://revalidate-on-demand.vercel.app.
Head over to your Supabase dashboard and navigate to Database > Function Hooks and click Enable Hooks .
Create a Function Hook with the following:
Name: on_blog_change
Table: posts
Events: Insert , Update and Delete
Type of hook: HTTP Request
Method: POST
URL: <your-vercel-url>/api/revalidate
The Next.js docs suggest generating a secret to ensure Supabase is the only one that can call your
/api/revalidateendpoint. HTTP Params is where you would put that secret value.
Awesome! Supabase will now ping our /api/revalidate endpoint anytime posts are inserted, updated, or deleted, and Next.js will automatically rebuild those pages on demand! 🎉
You can test this by navigating to the Vercel URL of your deployed app, then creating a new post in Supabase.
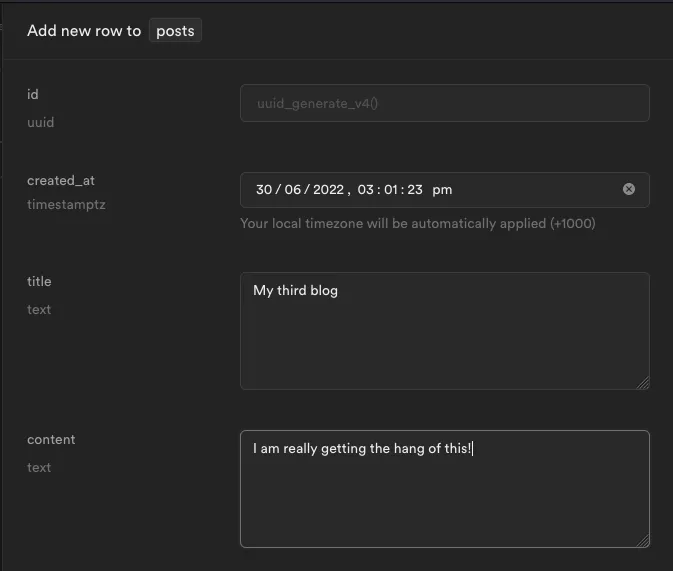
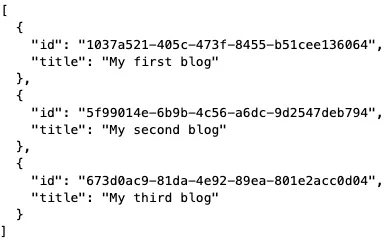
Refresh your landing page and you should see the new post appear.
Now navigate to the details page of one of your blogs by appending its ID to the URL.
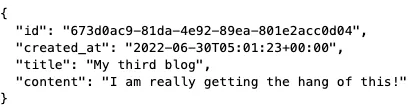
Update the content in Supabase and refresh the page.
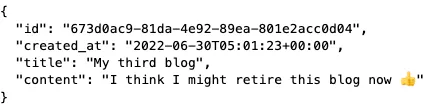
And finally, delete the post in Supabase and refresh the page.

And navigate back to the landing page to confirm it has been removed from the list of posts.

And that’s it! No more worrying about weighing up performance vs fresh content — just have both! 🙌
If you liked this article, come follow me on Twitter!