Create an isomorphic Supabase client in Remix with Environment Variables
8th April 2022
🚀 Just want the final version of the code, check out the Github repo.
What are Environment Variables?
Environment variables are special values we want to make globally available within whatever environment our code is being executed - either the client’s browser or the web server hosting our app. The environment variables on our server are commonly secret values that we don’t want to expose to our client’s browser, or have embedded in our code and committed to source control - GitHub etc.
🤔 Environment variables exposed to the client’s browser are easily viewable and should only ever be public values that you are happy for anyone to know on the wide wide internet!
Some frameworks — such as Next.js — include a method for declaring environment variables available to any server-side code, and a naming convention to expose particular values to the browser - prepending with NEXT_PUBLIC_ in the case of Next.js.
As seen in the Remix documentation, dotenv is supported by default when running locally in development mode. However, these values are only available server-side - loaders and actions etc. If we want to make these values available to our client-side - React components - we will need to do a bit of work. Let’s start by creating a new Remix app.
Creating a Remix app
npx create-remix@latest
This will step through creating our basic Remix project. Feel free to answer the questions however you would like - it shouldn’t change anything for this example. I went with the following:
- Just the basics
- Remix App Server
- JavaScript
Now change into the directory and start the Remix development server.
cd supabase-example
npm run dev
Your app should now be running at http://localhost:3000.
Let’s declare some environment variables!
Server-side
As mentioned above, environment variables for the server-side are configured out of the box. Simply create a .env file and add the values.
TEST=working
🤔 you will need to restart the dev server anytime a value is added, modified or removed from the .env file.
🚔 the
.envfile is excluded from git commits as Remix automatically adds it to the .gitignore file.
Now if we open up app/root.jsx and add the following block, we can see our value printed out in our dev console.
export const loader = () => {
  console.log(process.env.TEST);
  return null;
};
If we try to move this console.log(process.env.TEST); statement to our component we will see the value printed to our dev console - because the first render occurs server-side (SSR) - followed by a big scary Application Error in the browser and a stream of RED in the console!
I guess this means “do not do this in Remix please”!
Now, to create our Supabase client we need the url and anon key for our Supabase instance. These are both public values that we don’t need to keep secret, provided we have enabled Row Level Security (RLS) for the table - we will cover creating a Supabase instance and enabling RLS later.
📹 Checkout this video to learn more about RLS.
Time to make some environment variables available to the client!
Client-side
Let’s replace the contents of our .env file with the following and restart the dev server:
SUPABASE_URL = hello - client;
SUPABASE_ANON_KEY = also - on - client;
🤔 We will use real values once we have created a Supabase instance.
Again, these values are available in our loader, as it runs on the server. If we want them to be available within our component, we need to pass them from the server to the client 🤝
Let’s modify our loader function in app/root.jsx to return these values in an env object.
export const loader = () => {
  return {
    env: {
      SUPABASE_URL: process.env.SUPABASE_URL,
      SUPABASE_ANON_KEY: process.env.SUPABASE_ANON_KEY,
    },
  };
};
Now in our component we can call useLoaderData to get the values returned from the loader function, and print out the values in the env object to the console.
import {
  // other imports
  useLoaderData,
} from "remix";

// other exported functions

export default function App() {
  const { env } = useLoaderData();
  console.log({ env });
  // stuff to return
}
So now we have the values in our root.jsx file, but we want them to be globally accessible within our application. Where can we store them that is available globally in the browser?
The window ! Welcome back those jQuery vibes! 🕺
Let’s add the following <script> tag in the <body> section of the JSX being returned in app/root.jsx .
<body>
  <Outlet />
  <script
    dangerouslySetInnerHTML={{
      __html: `window.env = ${JSON.stringify(env)}`,
    }}
  />
  // other JSX
</body>
After a refresh, we can type window.env directly into the browser’s console and see our SUPABASE_URL and SUPABASE_ANON_KEY .
We have successfully piped those environment variables through from process.env - available server-side - to our window - available on the client! 🎉
Now we just need to wire it up to a Supabase project.
Creating a Supabase project
🚀 Feel free to skip this step if you already have a project up and running!
Head over to the Supabase website and click Start your project .
🤔 You will need to authenticate with GitHub if this is your first time.
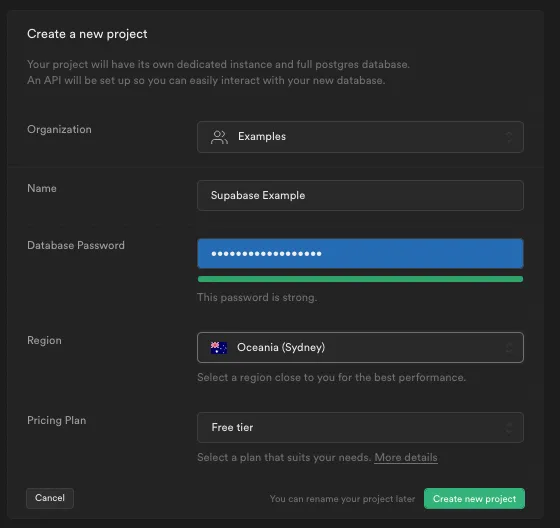
Once you have reached the Supabase dashboard, click New project .
Give it a Name , strong Database Password , choose a Region that is nice and close to you and click Create new project .
⏳ It will take a little bit of time to scale up all this infrastructure. Good time for a ☕️ or a 🍺.
Once your project is up and running, we need to create some tables to store our data. We are going to be super creative here and build a blog. Therefore, we need a posts table.
This can be done manually through the Table Editor menu, but we are going to head over to the SQL Editor and click New query , copy and paste the following and click RUN .
create table posts (
  id bigint generated by default as identity primary key,
  inserted_at timestamp with time zone default timezone('utc'::text, now()) not null,
  updated_at timestamp with time zone default timezone('utc'::text, now()) not null,
  title text,
  content text
);
We should see the text Success. No rows returned in the Results section.
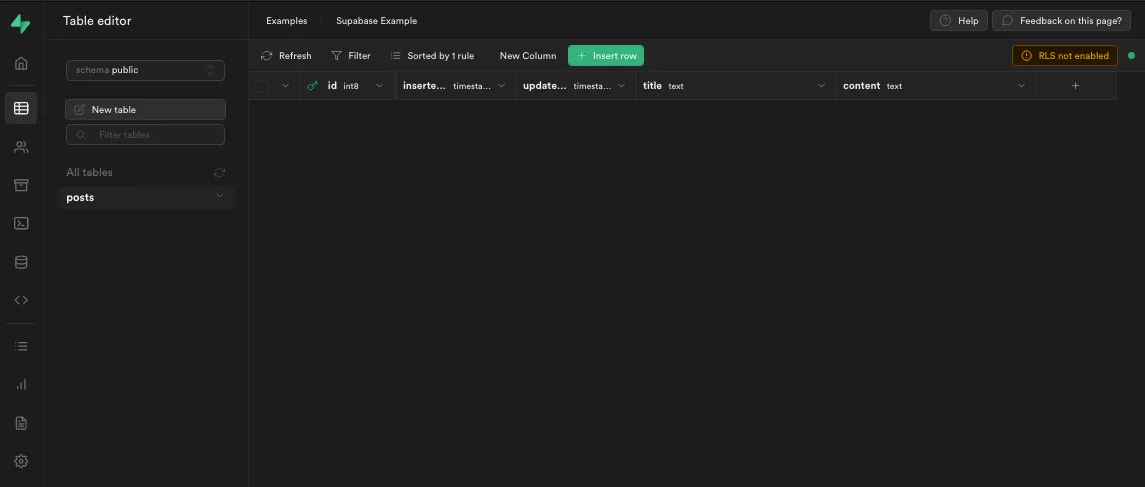
We can confirm that this table has been created successfully by heading over to the Table Editor menu and clicking the posts table.
It should look something like this 👇
Click Insert row and add a couple of posts.
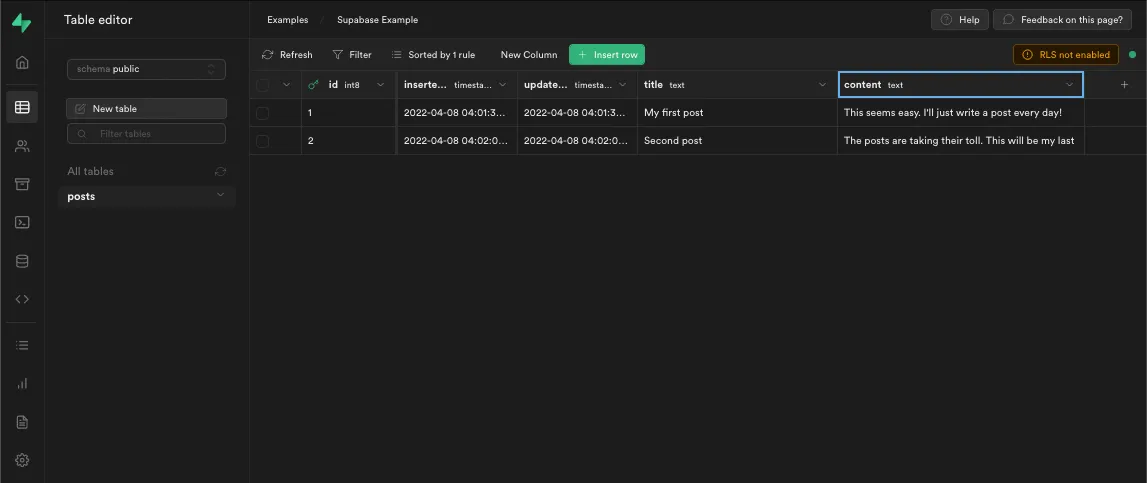
Supabase Dashboard Table Editor showing example posts
Let’s create a Supabase client so we can query these posts in our Remix app.
Supabase client
Head over to your project’s API Settings and copy the values of your URL and anon key, and paste them in your .env file.
SUPABASE_URL=your-supabase-url
SUPABASE_ANON_KEY=your-supabase-anon-key
Now let’s install the @supabase/supabase-js library to talk to our Supabase instance.
npm i @supabase/supabase-js
Next we want to create a new utils folder at app/utils and then a new file called supabase.js with the following content.
import { createClient } from "@supabase/supabase-js";

export default createClient(
  window.env.SUPABASE_URL,
  window.env.SUPABASE_ANON_KEY
);
This will create a Supabase client with our environment variables available on the window , however, we also want to be able to talk to Supabase from our actions and loaders and on our first SRR render - where there is no window .
For this, we need to ask “are we currently running in a browser or on the server”?
const isServer = typeof window === "undefined";
And then if it is the server, let’s use the environment variables from process.env , otherwise window.env .
const supabaseUrl = isServer
  ? process.env.SUPABASE_URL
  : window.env.SUPABASE_URL;

const supabaseAnonKey = isServer
  ? process.env.SUPABASE_ANON_KEY
  : window.env.SUPABASE_ANON_KEY;
Now we can update our createClient statement to use these variables. The whole file should look something like this.
import { createClient } from "@supabase/supabase-js";

const isServer = typeof window === "undefined";

const supabaseUrl = isServer
  ? process.env.SUPABASE_URL
  : window.env.SUPABASE_URL;

const supabaseAnonKey = isServer
  ? process.env.SUPABASE_ANON_KEY
  : window.env.SUPABASE_ANON_KEY;

export default createClient(supabaseUrl, supabaseAnonKey);
Now we can instantiate a Supabase client from anywhere in our Remix app.
Let’s open up app/routes/index.jsx and replace with the following.
import supabase from "../utils/supabase";

export default function Index() {
  return <p>Our posts</p>;
}
We want to confirm our client-side querying logic is working so let’s add a useEffect.
import supabase from "../utils/supabase";
import { useEffect } from "react";

export default function Index() {
  useEffect(() => {
    const getPosts = async () => {
      // get posts from Supabase
    };
    getPosts();
  }, []);

  return <p>Our posts</p>;
}
Okay, a little bit messy because we need to do some async stuff in useEffect , but let’s get those posts from Supabase!
const { data } = await supabase.from("posts").select("*");
Easy! But now we need to store the posts so we can map over them in our component.
A wild useState appeared!
import supabase from "../utils/supabase";
import { useEffect, useState } from "react";
export default function Index() {
const [posts, setPosts] = useState([]);
useEffect(() => {
const getPosts = async () => {
const { data } = await supabase.from("posts").select("*");
setPosts(data);
};
getPosts();
}, []);
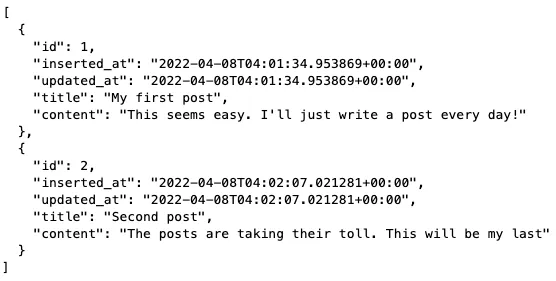
return <pre>{JSON.stringify(posts, null, 2)}</pre>;
}
🤔
JSON.stringify(posts, null, 2)is just a way to pretty print a blob of JSON - like this 👇
Now our posts are displaying correctly in our application, but the code is a bit verbose, and we get that flash of an empty array, while we’re waiting for posts to come back from Supabase - hit refresh to see this.
Let’s fetch those posts the Remix way!
import supabase from "../utils/supabase";
import { useLoaderData } from "@remix-run/react";

export const loader = async () => {
  const { data: posts } = await supabase.from("posts").select("*");
  return { posts };
};

export default function Index() {
  const { posts } = useLoaderData();
  return <pre>{JSON.stringify(posts, null, 2)}</pre>;
}
Much cleaner! And no more flash of empty state while we’re waiting!
Thanks Remix! 💿
🤔 You may feel like we wasted a bit of time adding all that client-side stuff to then just request data from Supabase server-side - well spotted! We will be using Supabase client-side for auth and realtime stuff in coming articles.
If you enjoyed this example and want to go deeper with Remix and Supabase, check out my new Level Up Tutorials course where we build a realtime chat application.
In the next article, we will look at adding Supabase Auth 🚀